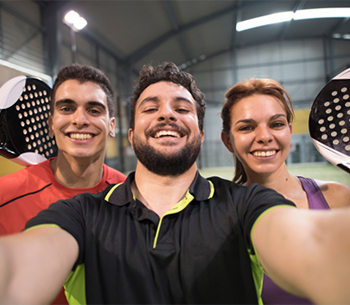
Padel, a sport that fuses the strategic finesse of tennis with the dynamic wall-play of squash, has captivated players worldwide.
The sport’s impressive list of shots reflects its Spanish roots and the tactical creativity it demands. Names like La Chiquita and Vibora are as distinctive as their execution, while universal shots like the forehand and lob offer familiarity with unique nuances tailored to padel’s fast-paced environment.
Mastering these shots requires understanding their purpose, where and when to use them, and how to execute them effectively. This guide delves into each shot, providing technical insights, strategic tips, and even specific points on racket-ball contact.

Forehand
Purpose
The forehand is the most fundamental and versatile shot in padel, forming the backbone of your gameplay. It’s used for controlling rallies, applying pressure on your opponent, and setting up attacking opportunities. The forehand’s adaptability allows it to transition seamlessly between defensive, neutral, and offensive playstyles, making it a cornerstone of every padel player’s skillset.
When and Where:
From the Baseline:
- Use the forehand for deep, consistent rallies aimed at keeping your opponent on the defensive.
- Ideal for returning balls that bounce near the back wall.
At Mid-Court:
- The forehand becomes a transition shot, used to move forward while applying moderate pressure.
- Employ it to set up a stronger attacking position closer to the net.
Near the Net:
- Use a compact forehand stroke to execute controlled volleys or finish points with sharp angles or power.
Technique
Stance
- Start in a neutral stance with your feet shoulder-width apart.
- As the ball approaches, turn sideways, aligning your non-dominant shoulder toward the net.
Grip
- Use a continental or semi-western grip for maximum control and spin potential.
Contact Point:
- Strike the ball in front of your body at waist height.
- Aim to contact the ball with the center of the racket face to optimize power and precision.
Follow-Through
- After contact, extend your arm forward and upward, finishing with the racket pointing toward your target.
- A smooth follow-through ensures accuracy and consistent ball trajectory.
Tips for Mastery
Focus on Spin: Add topspin to your forehand to keep the ball low and force your opponent into uncomfortable positions.
Control the Angle: Direct the ball cross-court to open up the court or aim down the line to surprise your opponent.
Footwork is Key: Position yourself early to avoid hitting off-balance forehands. This ensures better control and reduces errors.
Adapt Your Swing: Use a full swing for baseline rallies and a shorter, controlled stroke near the net.
Common Mistakes to Avoid
- Overhitting: Trying to add too much power often sacrifices control and leads to unforced errors.
- Poor Positioning: Standing too close to or too far from the ball disrupts timing and accuracy.
- Swinging Too Late: Ensure your swing starts as the ball approaches to avoid rushed or mistimed shots.
Drills to Practice
- Cross-Court Rallies: Focus on maintaining consistency and depth with your forehand.
- Target Practice: Place cones or markers on the court and aim your forehand at them to improve placement.
- Forehand Spin Drills: Practice adding topspin by brushing up the back of the ball during your stroke.
When to Avoid the Forehand
- Avoid using a forehand when off-balance or out of position; in such cases, switching to a defensive backhand or lob may be more effective.
Summary
The forehand is a fundamental yet versatile weapon in any padel player’s arsenal. Whether you’re rallying from the baseline or attacking near the net, mastering the forehand ensures that you can adapt to any situation on the court with confidence.

Backhand
Purpose
The backhand in padel is a crucial shot for maintaining balance and control, particularly when the ball is directed to your non-dominant side. While often perceived as less natural than the forehand, a well-executed backhand can provide defensive stability, tactical precision, and offensive opportunities. Developing a reliable backhand adds versatility to your game and helps you dominate rallies from any position on the court.
When and Where to Use It
- From the Baseline:
- Essential for returning deep balls, especially when pressured on the non-dominant side.
- Use the backhand to sustain long rallies and target your opponent’s weak spots.
- At Mid-Court:
- Employ the backhand as a transition shot when moving toward the net or repositioning after a defensive exchange.
- Near the Net:
- Use a compact backhand for quick volleys or angled shots to keep opponents off-balance.
Technique
- Stance:
- Begin with a neutral stance and pivot to position your non-dominant shoulder toward the net.
- Keep your feet shoulder-width apart, with your weight slightly on your front foot.
- Grip:
- Use a continental grip for versatility or a two-handed grip for added stability and power.
- Contact Point:
- Strike the ball in front of your body at waist height.
- Ensure contact is made with the center of the racket face for maximum precision and control.
- Swing and Follow-Through:
- Execute a compact swing, keeping the racket low to high for defensive backhands and high to low for slice or attacking shots.
- Follow through toward your target, ensuring fluidity and balance.
Tips for Mastery
- Maintain a Stable Base: Keep your knees bent and your torso steady to generate power and control.
- Practice Cross-Court Shots: Cross-court backhands are safer and open up the court for strategic plays.
- Use the Backhand Slice: Adding slice to your backhand can create low, skidding shots that are hard for opponents to return.
- Adjust for Power and Control: Use a two-handed grip for power shots and a one-handed grip for finesse and reach.
Common Mistakes to Avoid:
- Poor Footwork: Not moving into position early enough can result in rushed or off-balance shots.
- Overuse of the Slice: While effective, relying solely on slice backhands can become predictable.
- Swinging Too Wide: Keep your swing compact to maintain accuracy, especially during fast rallies.
Drills to Practice
- Backhand Wall Practice: Hit the ball against a wall using your backhand, focusing on consistency and control.
- Cross-Court Rallies: Work with a partner to develop depth and precision on your backhand.
- Two-Handed Power Drills: Focus on generating power with a two-handed grip while maintaining accuracy.
When to Avoid the Backhand
- Avoid using a backhand when a forehand pivot or quick repositioning would allow for a more natural shot. Opt for a forehand or lob when caught out of position.
Summary
The backhand is a versatile shot that provides a blend of control and tactical depth. Whether you’re defending from the baseline or attacking near the net, mastering the backhand ensures you can handle any situation with confidence and precision.

Volley
Purpose
The volley in padel is an indispensable shot for asserting dominance at the net. Unlike groundstrokes, volleys are executed before the ball bounces, making them ideal for fast-paced exchanges. A well-executed volley can put opponents on the defensive, create scoring opportunities, and maintain offensive momentum. Mastering the volley allows you to control the net, one of the most strategically advantageous positions in padel.
When and Where to Use It
- At the Net:
- Volleys are primarily used when you or your team are positioned close to the net.
- They are effective for maintaining pressure on opponents and forcing weak returns.
- During Transition:
- Use volleys when moving toward the net after a well-placed shot, ensuring you maintain control and offensive positioning.
- In Defensive Scenarios:
- A controlled volley can neutralize an opponent’s aggressive shot, buying time to regain a strong position.
Technique
- Stance:
- Stand with your feet shoulder-width apart, knees slightly bent, and weight on the balls of your feet for quick reactions.
- Keep your racket in front of your body at chest height.
- Grip:
- Use a continental grip, allowing flexibility for both forehand and backhand volleys.
- Contact Point:
- Strike the ball in front of your body, slightly above net height.
- Aim to hit the ball with the center of the racket face for precision and control.
- Swing and Follow-Through:
- Use a compact, controlled swing, focusing on placement rather than power.
- The follow-through should be minimal, directing the ball toward your intended target.
Tips for Mastery
- Focus on Placement: Volleys don’t rely on power; instead, aim for angles or weak spots in your opponent’s positioning.
- Stay Balanced: Keep your body steady and avoid overreaching to maintain control.
- Anticipate the Ball’s Trajectory: Stay alert to read the ball early and adjust your position for an optimal strike.
- Control the Depth: Mix deep volleys to the baseline with short, angled volleys to keep your opponent guessing.
Common Mistakes to Avoid
- Swinging Too Hard: Power isn’t necessary for volleys; focus on finesse and placement.
- Poor Footwork: Failing to position yourself properly can lead to mistimed or off-balance shots.
- Overextending the Follow-Through: A long follow-through can cause loss of control and reduce reaction time.
Drills to Practice
- Wall Volley Drill: Practice consistent volleys against a wall to develop control and precision.
- Partner Angle Drill: Work with a partner to volley at sharp angles, improving accuracy and placement.
- Reaction Speed Drill: Have a partner feed rapid volleys to simulate game-like scenarios and improve reflexes.
When to Avoid the Volley
- Avoid attempting a volley when the ball is too far to reach comfortably; in such cases, let the ball bounce and prepare for a groundstroke or lob.
Summary
The volley is an essential skill for controlling the pace and direction of play at the net. Mastering this shot enables you to maintain offensive pressure, outmaneuver opponents, and finish points effectively. Practice consistently to refine your technique and solidify your presence at the net.

Smash
Purpose
The smash is one of the most powerful and decisive shots in padel. It’s used to end points or apply significant pressure on opponents. Unlike the tennis smash, the padel smash often incorporates finesse and placement to utilize the court’s walls or force a weak return. Mastering this shot allows players to convert defensive lobs into offensive opportunities, making it a crucial part of an advanced padel strategy.
When and Where to Use It
- Against High Lobs:
- Use the smash to counteract high lobs from opponents, particularly when the ball is within a comfortable overhead reach.
- At the Net or Mid-Court:
- The smash is most effective near the net or mid-court, where you can angle the ball downward or utilize the back wall for a tricky rebound.
- To Control or End the Rally:
- Execute a powerful or angled smash to force an opponent into a weak return or end the rally outright.
Technique
- Stance:
- Position yourself under the ball with your feet shoulder-width apart.
- Face slightly sideways to the net with your non-dominant hand pointing at the ball for balance and alignment.
- Grip:
- Use a continental grip to maintain control and versatility for spin or power.
- Contact Point:
- Strike the ball at the highest point you can comfortably reach.
- Aim to hit the ball with the upper center of the racket face for maximum force and accuracy.
- Swing and Follow-Through:
- Swing your racket with a full, fluid motion, keeping your arm extended.
- Follow through across your body or downward, depending on whether you’re aiming for the back wall or an immediate point finish.
Types of Smashes
- Flat Smash:
- A powerful, direct shot aimed to end the rally immediately. Best for balls that can be struck high and early.
- Topspin Smash:
- Adds topspin to the ball, making it drop sharply after hitting the back wall. Ideal for keeping the ball low and difficult to return.
- Angle Smash:
- Aimed at sharp angles, targeting corners or sides of the court to force difficult returns.
- Controlled Smash:
- A softer, more tactical smash aimed to rebound off the back wall for a strategic advantage.
Tips for Mastery
- Choose the Right Smash: Adapt your smash based on the ball’s height, position, and your opponent’s positioning.
- Focus on Timing: Strike the ball at the peak of its trajectory for maximum impact.
- Mix Power and Placement: Don’t rely solely on power; precise placement can be just as effective, especially against skilled opponents.
- Use Spin Strategically: Incorporate topspin or sidespin to make the ball’s trajectory unpredictable.
Common Mistakes to Avoid
- Overhitting: Excessive power without control can result in the ball bouncing out of play or creating easy returns.
- Poor Positioning: Failing to get under the ball early can lead to rushed or mistimed smashes.
- Predictable Placement: Always smashing to the same spot makes it easier for opponents to anticipate and counter.
Drills to Practice
- Timing Drill: Practice smashing balls fed at varying heights to improve timing and consistency.
- Spin Control Drill: Work on adding topspin or sidespin to your smash to develop variety and precision.
- Angle Smash Drill: Aim for specific corners of the court to refine your accuracy and placement.
When to Avoid the Smash
- Avoid smashing when the ball is too low or when you’re out of position. Opt for a controlled shot like a lob or drop shot to reset the point.
Summary
The smash is a high-impact shot that can turn the tide of a rally and secure crucial points. While power is an essential component, understanding when and how to use placement and spin effectively will make your smash a formidable weapon. Practice consistently to refine your technique and unleash your full potential on the court.

La Chiquita
Purpose
La Chiquita, meaning “the little one” in Spanish, is a soft and precise shot designed to disrupt your opponent’s positioning. This delicate shot lands just beyond the net, forcing your opponents to abandon their advantageous positions at the baseline and move forward into an awkward situation. It’s an excellent tool for catching opponents off guard and setting up an attacking opportunity.
When and Where to Use It
- From the Baseline:
- Use La Chiquita to transition from defense to offense by forcing your opponents closer to the net, breaking their rhythm.
- In Mid-Court Play:
- Perfect for exploiting an opponent’s poor positioning or hesitation.
- Against Defensive Opponents:
- When your opponents are positioned deep and comfortable at the baseline, La Chiquita forces them to come forward, opening up gaps for follow-up shots.
Technique
- Stance:
- Begin in a balanced, athletic stance, with your knees slightly bent and weight on the balls of your feet for better control.
- Grip:
- Use a continental grip to maintain flexibility and control over the ball.
- Contact Point:
- Strike the ball at waist level or slightly lower, using the lower center of the racket face to soften the impact.
- Shot Execution:
- Employ a short, controlled swing to minimize power and focus on precision.
- Aim for the ball to land just beyond the net, with enough spin to make it difficult for opponents to counterattack.
Tips for Mastery
- Disguise the Shot: Keep your swing consistent with other strokes to avoid telegraphing your intent.
- Focus on Placement Over Power: The key to an effective La Chiquita is where the ball lands, not how fast it travels.
- Combine With Other Shots: Use La Chiquita in combination with aggressive follow-up shots like volleys or smashes to capitalize on the openings it creates.
Common Mistakes to Avoid
- Hitting Too Hard: Overpowering the shot defeats its purpose, as the ball will travel too deep and give opponents time to recover.
- Poor Accuracy: A poorly placed La Chiquita can become an easy shot for opponents to attack.
- Predictability: Using this shot too often makes it easier for opponents to anticipate and counter.
Drills to Practice
- Target Practice: Place cones or markers just beyond the net and practice landing the ball in those areas.
- Baseline to Net Transition: Practice hitting La Chiquita while moving forward to simulate game-like situations.
- Angle Control Drill: Work on varying the direction of La Chiquita to target different parts of the court.
When to Avoid La Chiquita
- Avoid using La Chiquita if your opponents are already positioned near the net, as it may set them up for an easy attack.
- Use sparingly if the court surface is particularly fast, as the ball may not stay low enough to disrupt your opponents.
Summary
La Chiquita is a brilliant tactical shot that requires finesse, control, and strategic thinking. When executed well, it disrupts your opponent’s positioning, creating opportunities for aggressive follow-ups. With consistent practice and precise execution, this shot can become a valuable weapon in your padel arsenal.

Back Glass (Rebote)
Purpose
The Back Glass shot, or Rebote, is a defensive shot unique to padel, leveraging the court’s glass walls to regain control of the rally. When executed correctly, this shot allows players to neutralize powerful offensive strokes from their opponents, converting a defensive position into a neutral or even advantageous one. It’s an essential tool for playing intelligently and efficiently in the back of the court.
When and Where to Use It
- Under Defensive Pressure:
- Use the Back Glass when you’re pushed deep into the court and need to reset the rally.
- Against Fast Shots:
- Ideal for absorbing the speed of hard-hitting opponents by letting the ball rebound off the back wall before making your return.
- To Control the Pace:
- This shot is perfect for slowing down the game and giving yourself time to reposition.
Technique
- Positioning:
- Stand a few feet away from the back glass, allowing enough room for the ball to rebound and return to your hitting zone.
- Stay low and balanced with your knees bent, ready to adjust to the ball’s trajectory.
- Grip:
- Use a continental grip for versatility, allowing you to react to both forehand and backhand shots.
- Contact Point:
- Wait for the ball to rebound off the glass, then strike it at waist height with the center of the racket face.
- Ensure you hit the ball after it has rebounded slightly forward for better control.
- Swing and Follow-Through:
- Use a compact swing to guide the ball back over the net.
- Aim for depth and height to push your opponents back to their baseline.
Tips for Mastery
- Anticipate the Ball’s Rebound: Track the ball’s angle and speed to position yourself optimally for the return.
- Maintain Consistency: Focus on a clean, controlled shot rather than attempting anything risky or overly powerful.
- Adjust Based on Opponent Positioning: If your opponents are near the net, aim for high, deep returns to force them back.
Common Mistakes to Avoid
- Standing Too Close to the Wall: This limits your ability to adjust and results in rushed, mistimed shots.
- Overhitting: The goal of the Back Glass shot is to regain control, not to overpower your opponents.
- Misjudging the Rebound: Failing to read the ball’s trajectory can lead to awkward or ineffective returns.
Drills to Practice
- Rebound Timing Drill: Practice hitting balls off the back wall with a partner or against a wall to develop consistency and accuracy.
- Depth Control Drill: Focus on returning balls deep into your opponent’s court to reset the rally effectively.
- Angle Anticipation Drill: Work on positioning yourself based on the ball’s rebound angle to improve reaction time.
When to Avoid the Back Glass Shot
- Avoid using this shot when you have an opportunity to play an attacking shot, such as a volley or a direct return.
- Be cautious in windy conditions, where the ball’s trajectory can be unpredictable.
Summary
The Back Glass shot is an essential part of padel, allowing you to remain calm under pressure and reset the rally with precision. Mastering this shot will not only improve your defensive game but also provide opportunities to turn the tables on your opponents.

Vibora
Purpose
The Vibora (Spanish for “snake”) is an advanced shot known for its slicing motion and lateral spin. It’s designed to generate unpredictable ball movement, keeping it low and difficult for opponents to return effectively. The Vibora is a hybrid between a smash and a slice, combining power and spin for a tactical advantage.
When and Where to Use It
- During Overhead Rallies:
- Ideal for mid-height balls when the smash isn’t practical but an offensive shot is required.
- Against Weak Lobs:
- Use the Vibora to exploit poorly executed lobs by generating spin and difficult angles.
- To Maintain Offensive Pressure:
- Employ this shot to push opponents into awkward positions, forcing weak returns or errors.
Technique
- Stance:
- Position your body sideways to the net with your weight slightly on your front foot.
- Keep your knees bent and your body balanced for a controlled swing.
- Grip:
- Use a continental grip for flexibility and control over spin and power.
- Contact Point:
- Strike the ball at shoulder height with the lower edge or center of the racket face, slicing across the ball to generate spin.
- Swing and Follow-Through:
- Execute a slicing motion, brushing diagonally across the ball.
- Follow through low and across your body, mimicking the movement of a snake (hence the name Vibora).
Tips for Mastery
- Focus on Spin and Placement: Prioritize creating a low, spinning trajectory rather than relying solely on power.
- Exploit Angles: Aim for the corners or sides of the court to force difficult returns.
- Vary Your Shot Selection: Use the Vibora in combination with smashes or drop shots to keep opponents guessing.
- Maintain a Compact Swing: Avoid overextending your arm to ensure better control and consistency.
Common Mistakes to Avoid
- Overhitting: Excessive power can result in errors or predictable trajectories.
- Poor Spin Control: Without sufficient spin, the ball may bounce higher, making it easier for opponents to return.
- Improper Positioning: Failing to position yourself correctly under the ball can lead to mistimed or ineffective Viboras.
Drills to Practice
- Spin Development Drill: Practice slicing the ball diagonally across the court to refine spin and trajectory.
- Angle Targeting Drill: Set up cones or markers in the corners and practice hitting the Vibora to those areas.
- Repetition Rallies: Work with a partner to engage in rallies focused solely on Vibora shots to develop consistency.
When to Avoid the Vibora
- Avoid using the Vibora when under defensive pressure or when the ball is too low to execute the slicing motion effectively. Opt for a safer lob or defensive shot instead.
Summary
The Vibora is a versatile and impactful shot that can elevate your padel game to new heights. By mastering its spin, trajectory, and placement, you can disrupt your opponents’ rhythm and maintain offensive momentum. With consistent practice and strategic execution, the Vibora can become one of your most valuable tools on the court.

Back Wall Boast
Purpose
The Back Wall Boast is a creative and strategic shot that uses the back wall to redirect the ball at an unexpected angle. Borrowed from squash, this shot allows players to turn a defensive position into an offensive opportunity by surprising opponents with unconventional ball trajectories. It is particularly effective when you are pushed deep into your court or in situations where a direct return is difficult.
When and Where to Use It
- Defensive Scenarios:
- Use the Back Wall Boast when trapped at the back of the court and facing a difficult return.
- To Reset the Rally:
- Employ this shot to regain control and buy time to reposition yourself.
- Surprising Opponents:
- Use the unpredictable trajectory of the Back Wall Boast to catch your opponents off guard, creating openings for the next shot.
Technique
- Positioning:
- Stand a few steps away from the back wall, giving yourself enough room to adjust to the ball’s trajectory.
- Keep your knees bent and your body balanced for a smooth swing.
- Grip:
- Use a continental grip for maximum control and flexibility.
- Contact Point:
- Allow the ball to hit the back wall first, then strike it as it rebounds toward your hitting zone.
- Aim to make contact with the center of the racket face, ensuring a clean and controlled return.
- Swing and Follow-Through:
- Use a compact swing to guide the ball toward your desired target.
- Aim for the ball to travel to the opposite corner or side of the court, forcing your opponent to move laterally.
Tips for Mastery
- Anticipate the Rebound: Track the ball’s movement after it hits the back wall to position yourself correctly.
- Vary Your Placement: Mix up your shots by directing them to different parts of the court.
- Practice Timing: Work on hitting the ball at just the right moment after it rebounds for maximum control.
Common Mistakes to Avoid
- Standing Too Close to the Wall: This limits your ability to adjust and results in rushed, ineffective shots.
- Overhitting: Focus on placement rather than power, as a poorly controlled boast can create an easy opportunity for your opponent.
- Predictable Patterns: Vary your use of the Back Wall Boast to keep your opponents guessing.
Drills to Practice
- Rebound Control Drill: Practice hitting balls off the back wall repeatedly to develop consistency and precision.
- Angle Targeting Drill: Work on redirecting rebounds to specific areas of the court.
- Recovery Drill: Simulate game scenarios where you’re forced to use the Back Wall Boast to escape defensive situations.
When to Avoid the Back Wall Boast
- Avoid using this shot when you’re in an offensive position, as it’s designed to reset the rally rather than finish it.
Summary
The Back Wall Boast is a versatile and strategic shot that transforms defensive situations into opportunities for control. By effectively utilizing the back wall, players can reset rallies, disrupt their opponents’ rhythm, and regain an advantageous position on the court. Mastering this shot requires precise timing, strong positioning, and an understanding of ball trajectory. When executed correctly, the Back Wall Boast can be a game-changing tool, adding depth and creativity to your padel strategy. With practice and confidence, it becomes a reliable asset in your repertoire for handling challenging moments with finesse.
Off-the-Wall Shot
Purpose:
The Off-the-Wall Shot utilizes the side or back wall to recover difficult balls and create unexpected angles. This shot is especially useful in tight situations where the ball is moving quickly or at an awkward trajectory. Mastering this shot not only enhances your defensive capabilities but also opens up new strategic options.
When and Where to Use It:
- In Tight Spaces:
- Use this shot when the ball is rebounding off the side wall and is hard to reach directly.
- Against Fast Opponents:
- Employ the Off-the-Wall Shot to redirect the ball at challenging angles, forcing your opponents to reposition.
- Defensive Situations:
- Perfect for regaining control when your opponents are applying pressure.
Technique:
- Positioning:
- Adjust quickly to where the ball is rebounding, keeping a safe distance from the wall to allow room for your swing.
- Grip:
- Use a continental grip to maintain versatility and control.
- Contact Point:
- Wait for the ball to rebound off the wall, then strike it with the center of the racket face as it moves toward your hitting zone.
- Swing and Follow-Through:
- Use a short, controlled swing to guide the ball back over the net.
- Aim for angles that challenge your opponents and exploit gaps in their positioning.
Tips for Mastery:
- Read the Ball’s Movement: Anticipate the ball’s trajectory after hitting the wall to position yourself effectively.
- Use Angles Creatively: Redirect the ball in ways that force your opponents to move out of their comfort zones.
- Focus on Placement: Precision is more important than power for this shot.
Common Mistakes to Avoid:
- Miscalculating the Rebound: Misjudging the ball’s trajectory can lead to poor returns.
- Overreaching: Stay balanced and avoid extending too far to reach the ball.
- Lack of Follow-Through: Failing to complete your swing can result in weak or inaccurate shots.
Drills to Practice:
- Wall Anticipation Drill: Practice hitting balls off the side wall to improve your reaction time and positioning.
- Angle Redirection Drill: Work on redirecting balls at sharp angles to target different areas of the court.
- Defensive Recovery Drill: Simulate game scenarios where you must use the Off-the-Wall Shot to escape pressure.
When to Avoid the Off-the-Wall Shot:
- Avoid using this shot when you have time to set up for a more controlled or offensive return.
Summary
Both the Back Wall Boast and Off-the-Wall Shot are invaluable additions to your padel arsenal, enabling you to handle defensive situations with creativity and precision. With consistent practice, these shots can help you turn difficult moments into strategic opportunities.
Conclusion
Mastering the diverse array of padel shots is key to elevating your gameplay.
Each shot offers unique advantages and strategic potential, from the reliable forehand to the finesse of La Chiquita or the advanced Vibora. Understanding when and where to use these shots, and how to execute them with precision, will give you a competitive edge on the court.
Dive into the recommended YouTube tutorials for in-depth technique breakdowns, and remember, practice is the key to mastering the art of padel.